QuickBooks Tips & Tricks: How can I change the look of the forms in QuickBooks?
11/15/2011 - By Staff Writer
Intuit has updated the way you can customize forms in QuickBooks. You now have two options for customization that you can use together to make changes to your forms.

If you choose the second option, �Customize Data Layout�, it will take you to the customization options you are used to seeing in QuickBooks as shown below.
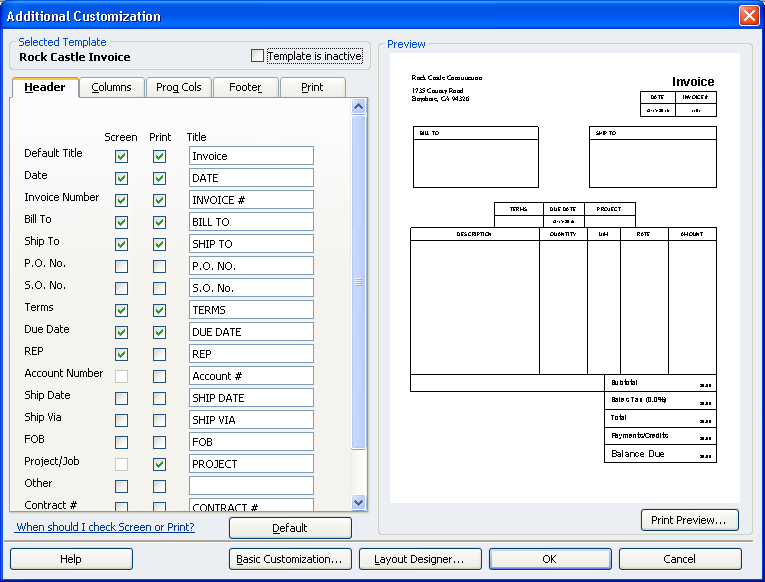
The second tab allows you to select which columns will appear on screen or on the form. You can also change the default title for fields such as �service date� to �serviced�. The order column determines the position of each column on the form. The item field is selected to show only on-screen so the first printed column on the hard copy of the invoice is the �description�.

On the final tab you can set printing options for the form. The default is to use the settings from the Printer Setup but you can choose to set a different orientation, copies etc. for this form including customizing the paper size.

The Basic Customization screen options allow you to change the font for field descriptions; apply a color scheme and select which company and transaction information will print on the form.

By selecting the Layout Designer button on the bottom of the screen, a window opens that shows the invoice as a grid with the fields currently used positioned on the grid as they appear when printed.
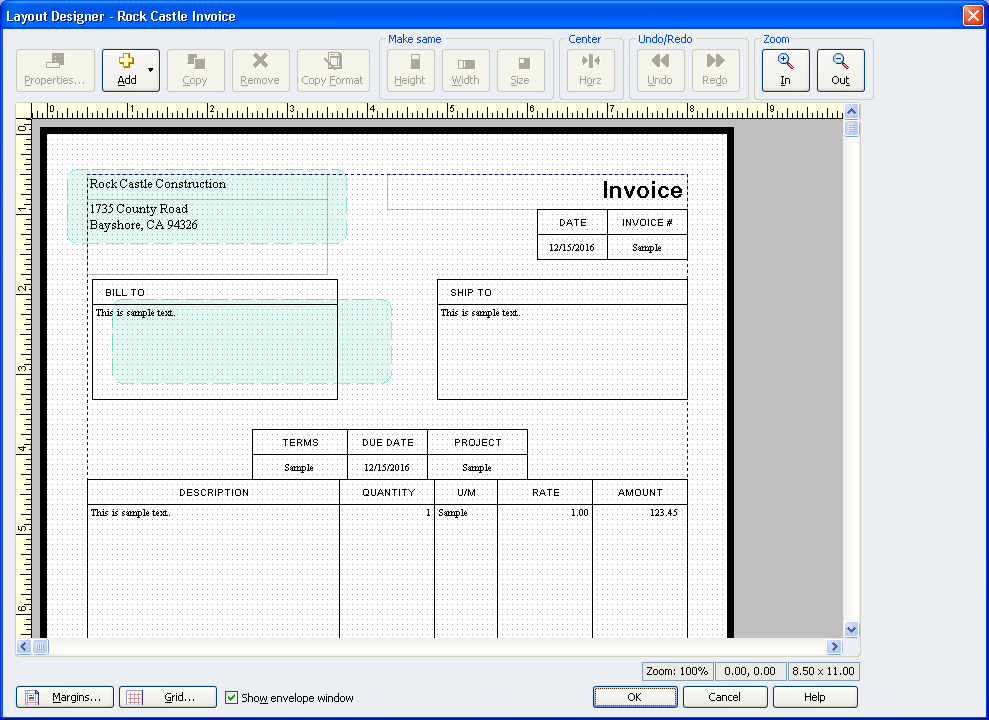
You can move, resize or delete the fields by selecting them one at a time; or clicking into the grid and holding the left mouse button down, then circling the fields you want to modify. When you release the mouse button the circled fields will be selected. You can move them as a group to another position on the form or delete them.
If you select the first customization option, �Create New Design� this will take you to the Intuit on-line QuickBooks Forms Customization. This expands your customization options. You can add a company logo or select a background as well as upload your own personal background.

Step two will customize the colors, fonts and company information that displays as shown below.
Step three customizes the grid style for your form and how it will print on the hard copy.
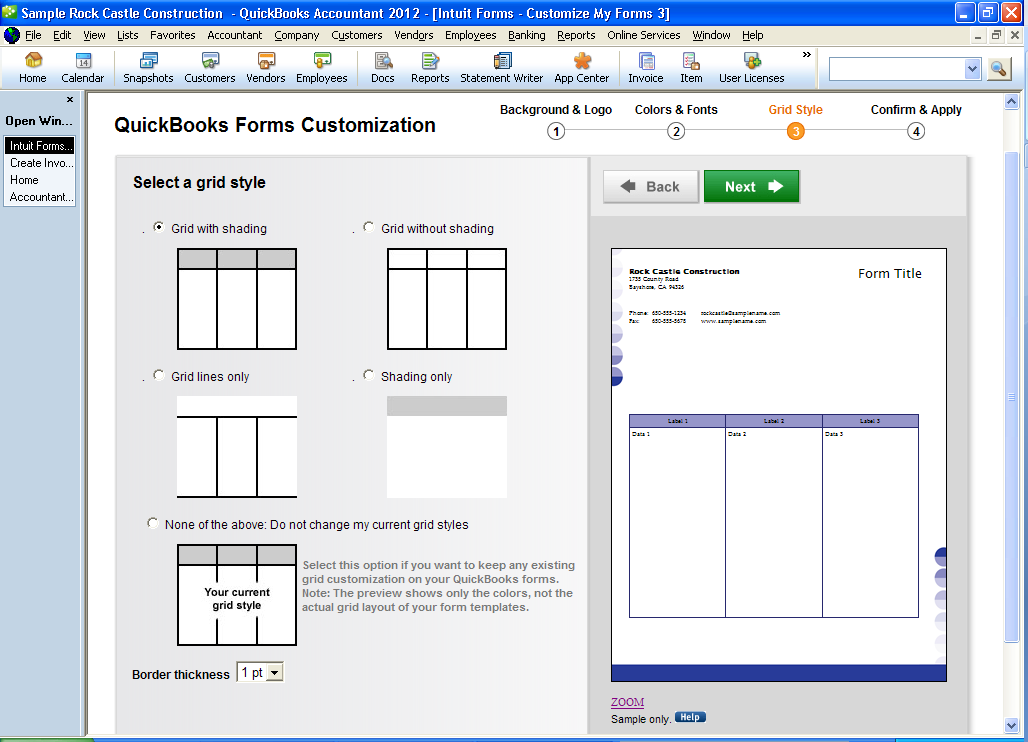
Step four shows the final result of your customizations. At this point you can confirm the final copy and apply it to your form. It will require you to sign in with the username and password you set up for your Intuit account when you installed the software.

The advantage to using this customization option is that you have many more choices available on-line from Intuit and from other users like you who are happy to share their set up.
If you would like help on setting up these forms, please call any of our QuickBooks ProAdvisors at (850) 435-8300. If you have any other QuickBooks questions or problems we will be happy to help you solve them.
**These tips are based on the 2012 version of QuickBooks.
Past Articles
- Allison Jones Elected Shareholder
- Saltmarsh Announces Internal Promotions of 2020
- Saltmarsh Again Named Regional Leader by Accounting Today
- Saltmarsh Wins Marketing Achievement Award for Commitment to Service
- Saltmarsh Announces the Internal Promotion of Caroline Beasley
- Important COVID-19 (Coronavirus) Updates
- The Statistics Are In: Saltmarsh Exceeds Its Community Service Goal During 75th Anniversary in 2019
- Saltmarsh Announces Internal Promotions of 2020
- Saltmarsh Named One of Forbes' Top Recommended U.S. Tax Firms
- Saltmarsh Surpasses Community Service Goal for 75th Anniversary
- Saltmarsh Welcomes Norm Provvidenza in Tampa
- Justin Tate Joins Saltmarsh Financial Advisors
- Saltmarsh Named Among Top 200 American Accounting Firms by INSIDE Public Accounting
- Christina Doss Featured in Bella Magazine's Passion Issue
- Takeaways from Saltmarsh Financial Advisors' Investment Education Series
- Wynne E. Baker joins Saltmarsh in Tennessee
- Accounting Today Honors Saltmarsh; Bell & Jackson Recognized on 2019 Inweekly Power List
- Saltmarsh Featured in Pensacola News Journal
- Saltmarsh Names Christina Doss Shareholder
- Saltmarsh Receives Recognition from Tampa Bay Business Journal
- Saltmarsh Names Kliossis Tax & Accounting Lead
- Saltmarsh Celebrates Professional Recognition Awarded to Three Top Employees
- Saltmarsh Announces Internal Promotions of 2019
- Saltmarsh Marks 75th Anniversary in 2019
- Banc Compliance Group, LLC Joins Saltmarsh
- View All Articles